Check or change the Site settings
Perform the Site setting.
Start-up
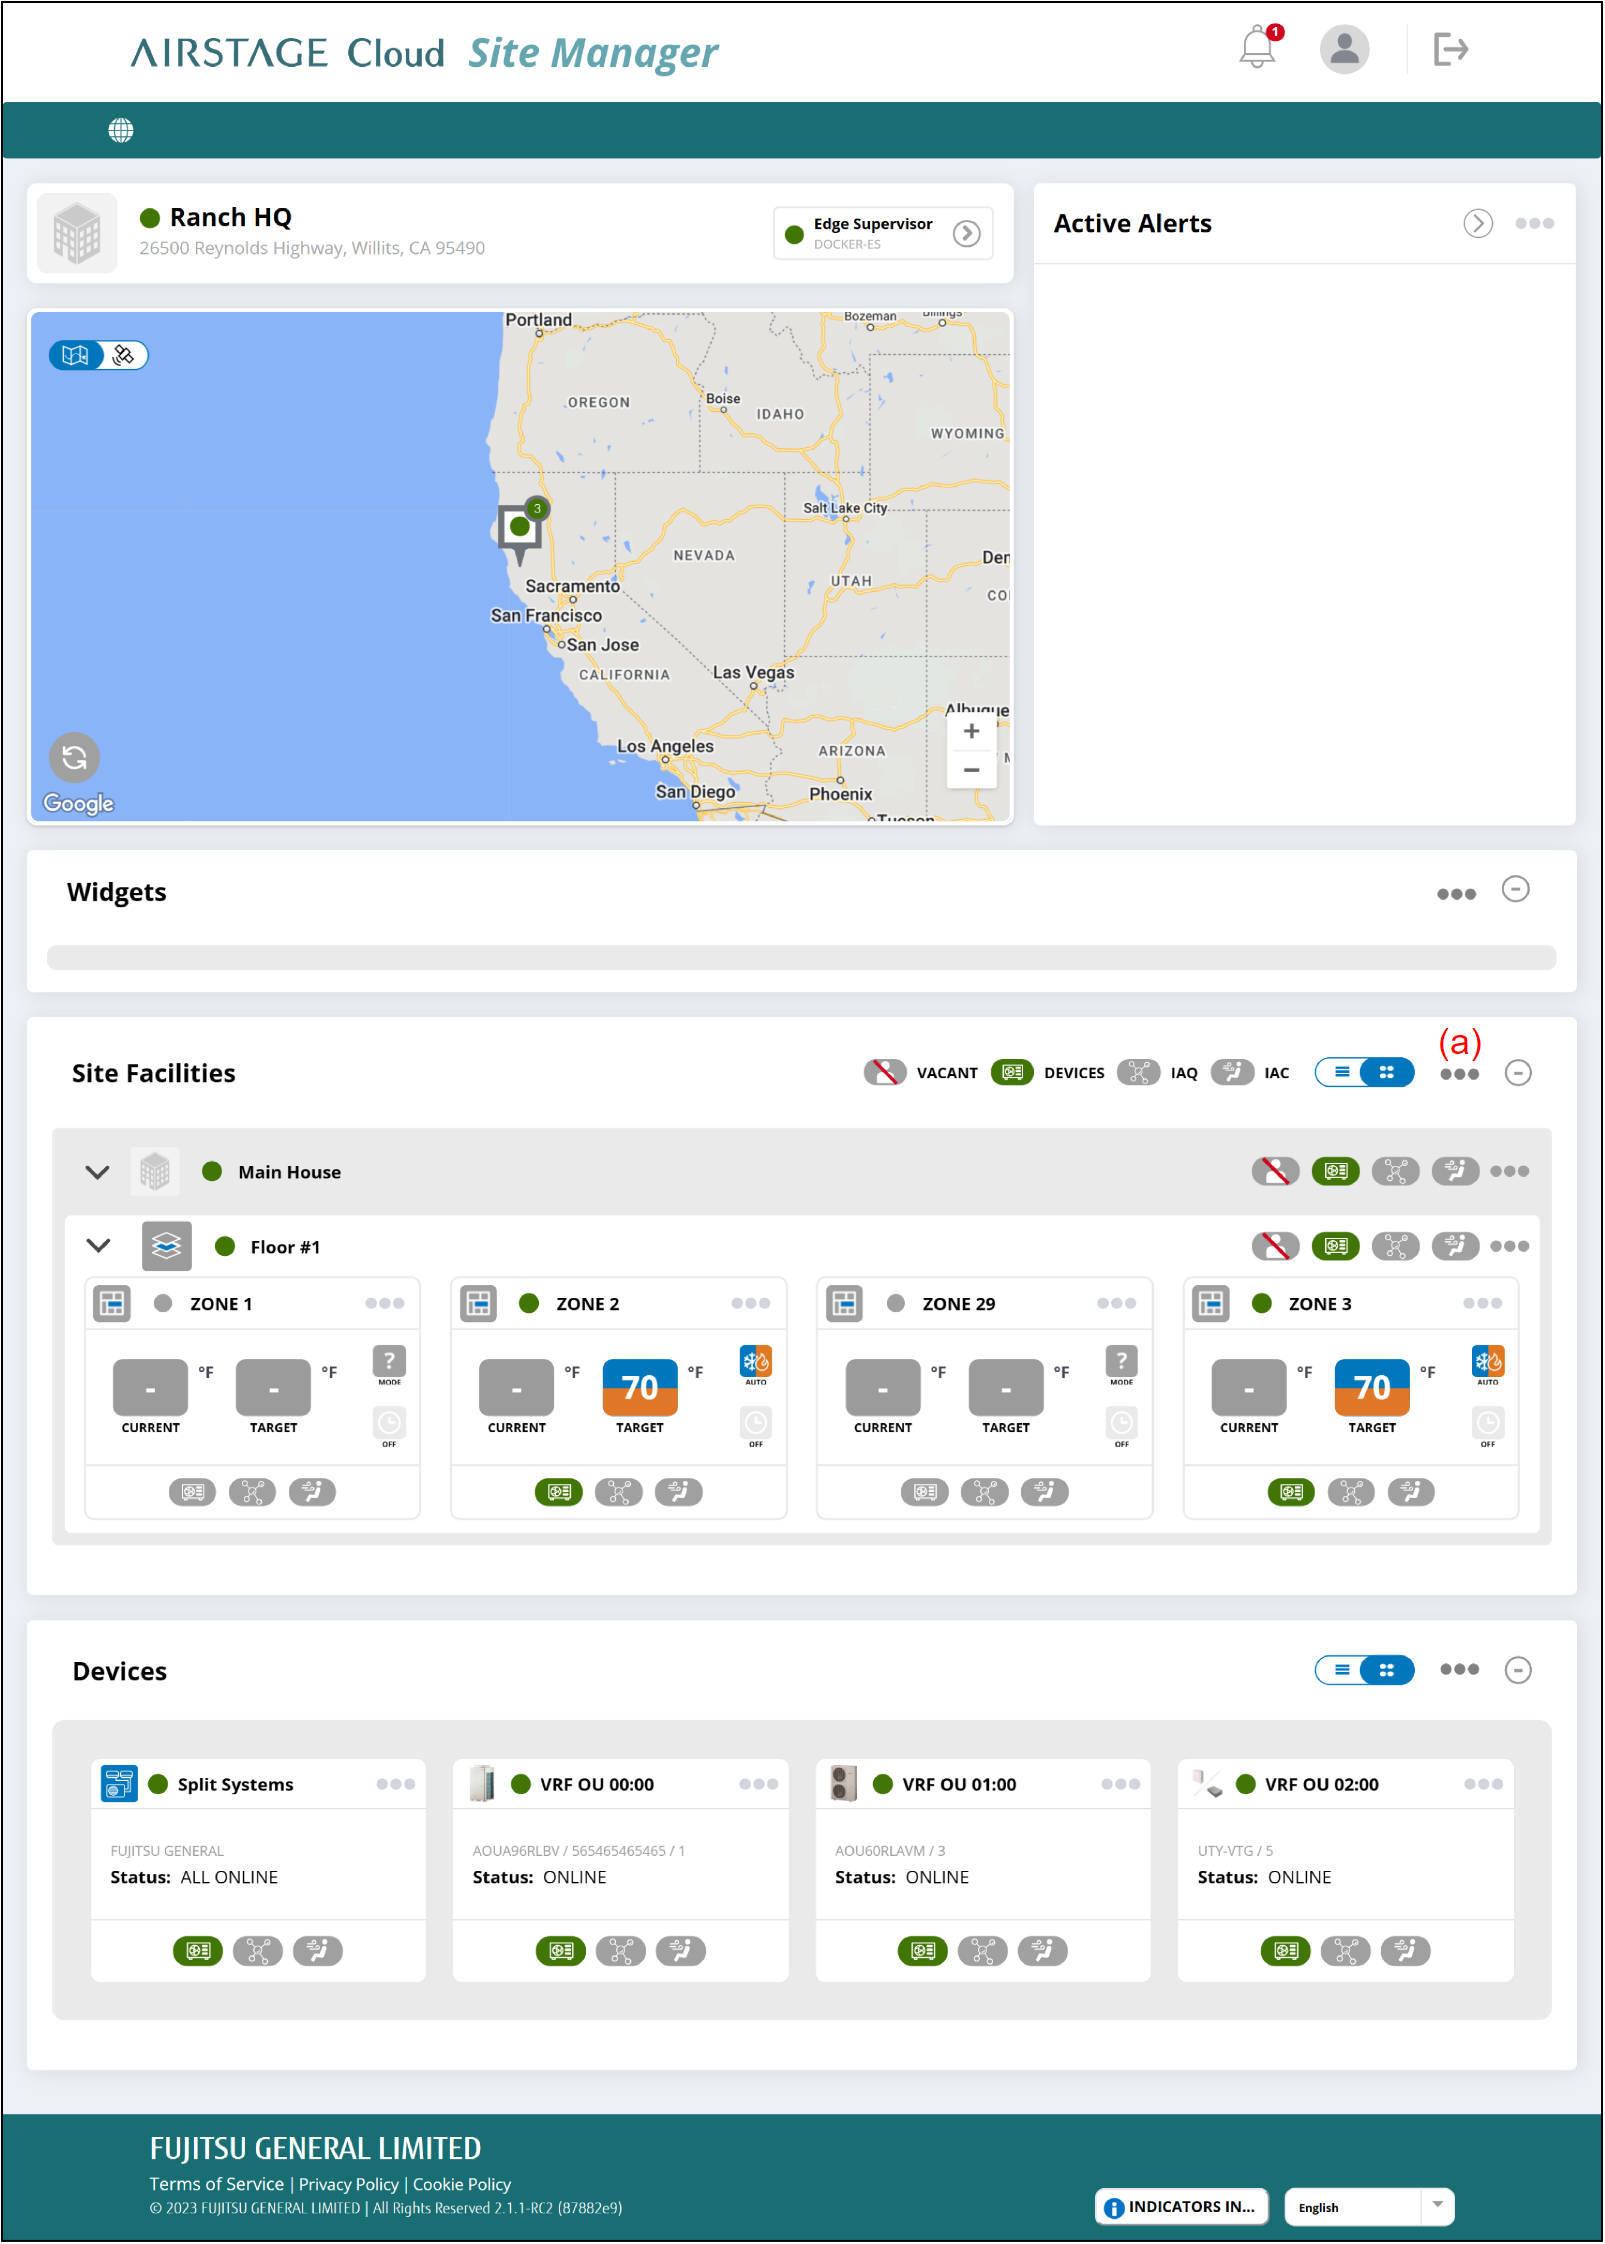
- Select [SITE SETTINGS] from link menu (a) on “Site Dashboard” screen.

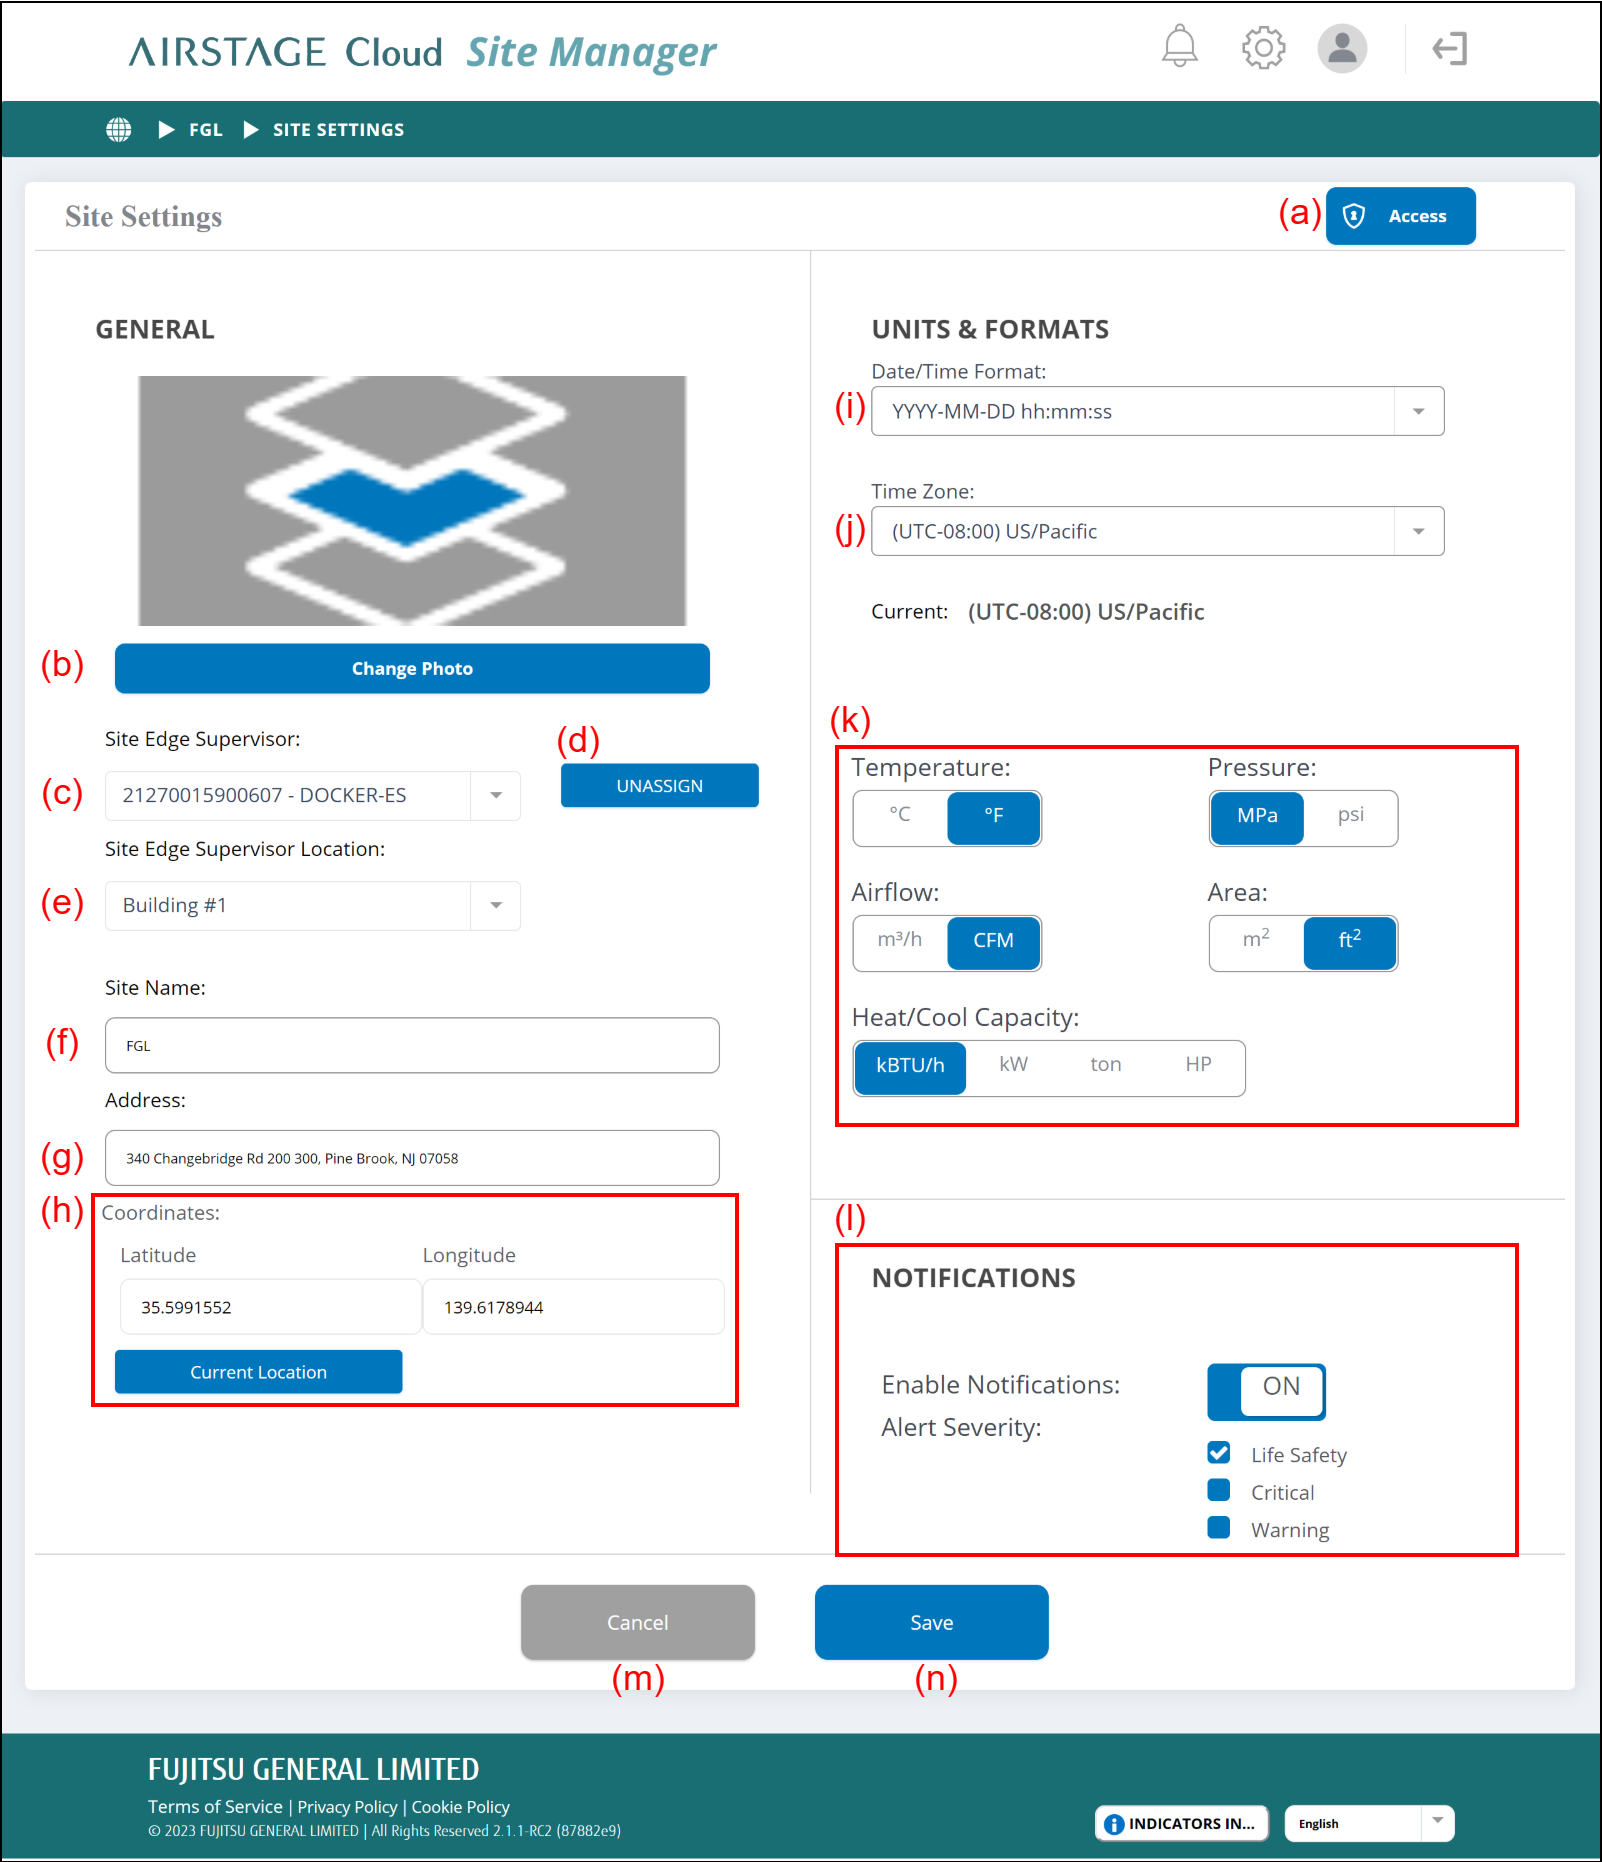
"Site Settings" screen
- Enter the following page information.
- To complete the setting, select the button (n).
The setting will be saved, and the window will close.
If you want to close the window without saving the changes, select the button (m).

(a) [Access] button
Sets the users who can access to this Site.
Refer to "Set the access grant to the Site (Only for Administrator)" for details.
* Only for Administrator.
(b) [Change photo] button
Sets the photo of the Site.
(c) Select the AIRSTAGE Cloud Edge Supervisor which is assigned to the Site.
(d) [ASSIGN] or [UNASSIGN] button
Assigns or unassigns the AIRSTAGE Cloud Edge Supervisor.
When you unassign the AIRSTAGE Cloud Edge Supervisor, it will reboot automatically.
(e) Select the installation location of the AIRSTAGE Cloud Edge Supervisor.
(f) Enter the Site name.
(g) Enter the address.
(h) Set the coordinates of the Site by either of the following methods.
- Input the latitude and longitude.
- Select [Current Location] button to acquire the present location information.
After setting the coordinates, the location of the Site is shown on the map of the "Portfolio Dashboard" screen.
(i) Set the date and time display.
(j) Set the time zone.
(k) Switch the unit for temperature, pressure, airflow, area, and heating/cooling capacity.
(l) Set the notification level about this Site.
When "OFF" is selected, no notification is sent in any condition.
When "ON" is selected, a notification is sent when the Site condition reaches the checked severity.