Initial Setup
Set up the AIRSTAGE Edge Controller after completing the installation.
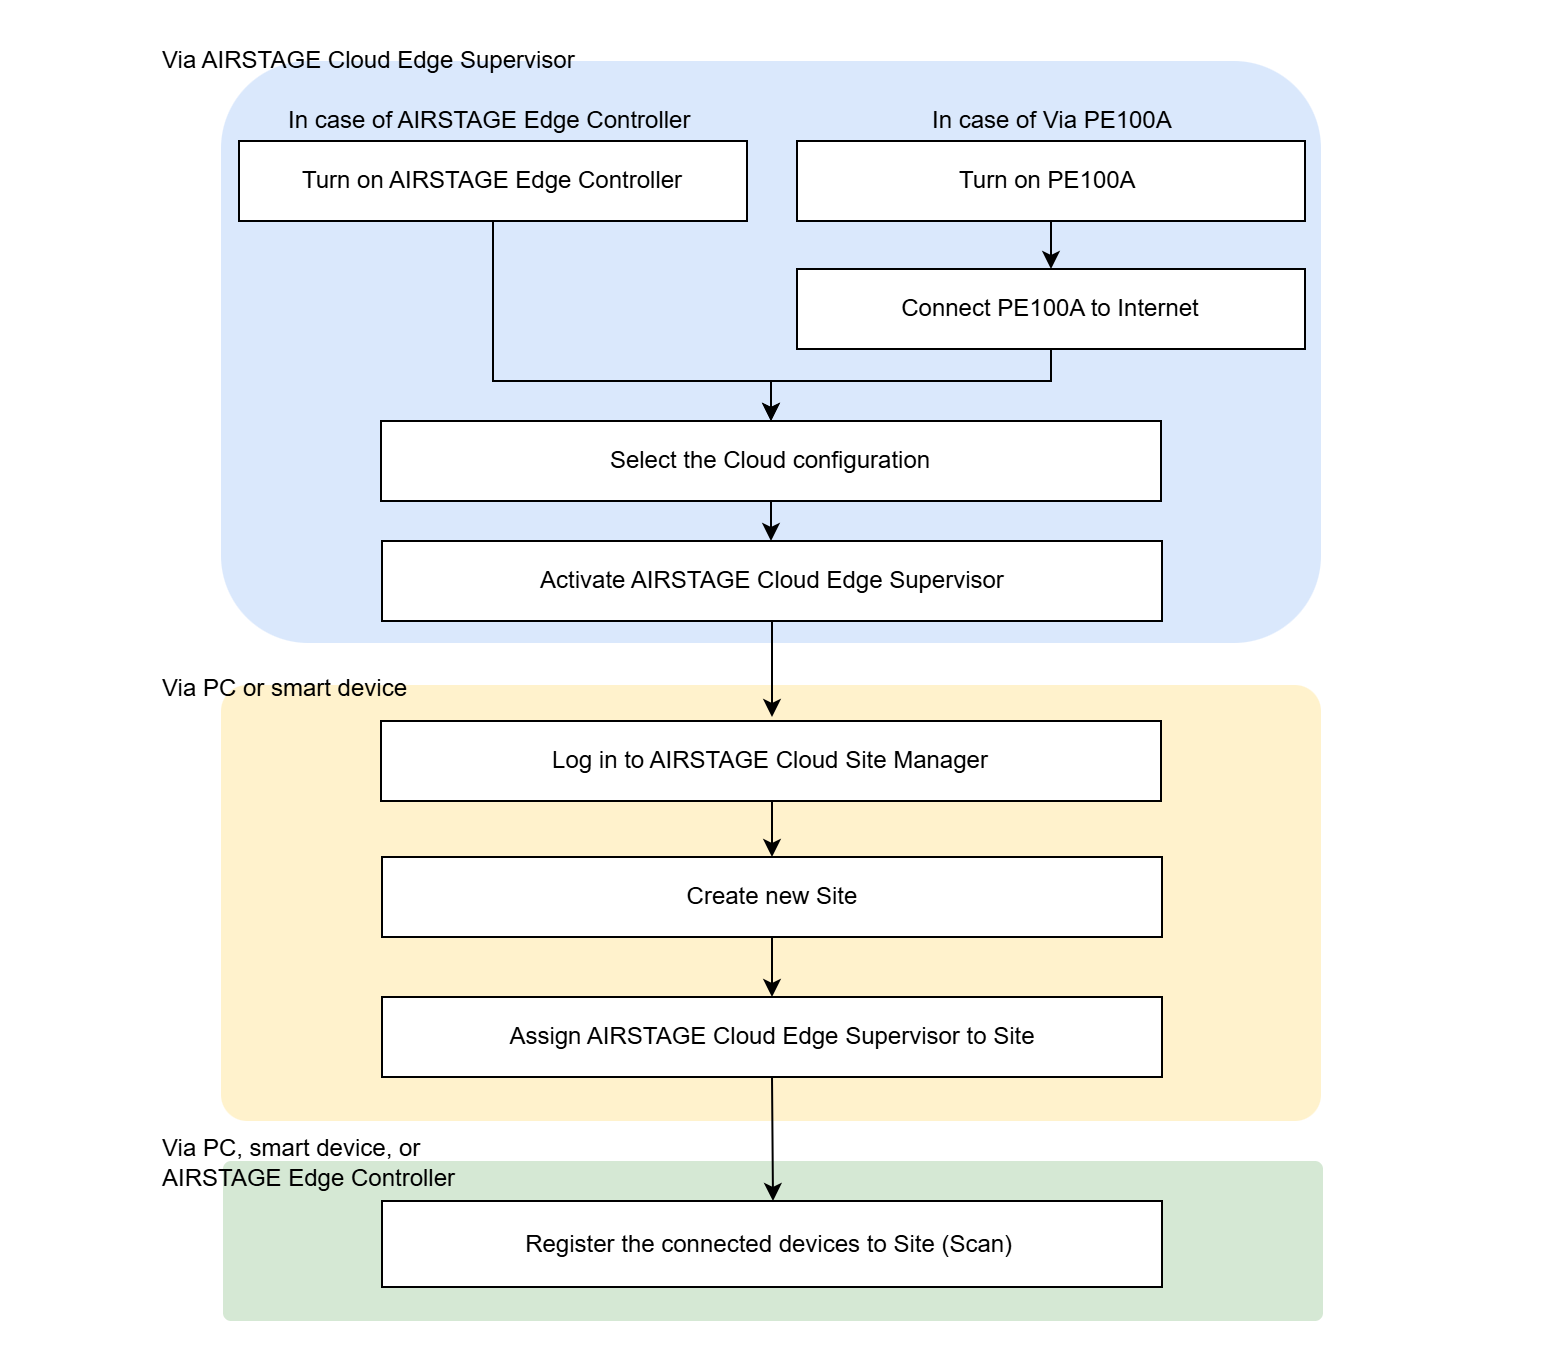
The overview of the initial setup is as follows.

Turn on AIRSTAGE Edge Controller
- Connect the AIRSTAGE Edge Controller to the power supply.
The AIRSTAGE Edge Controller starts automatically.
"AIRSTAGE" Logo is shown for a while, then the "Activation" screen will appear.
Turn on PE100A、Connect PE100A to Internet
Turn on PE100A
- Connect the PE100A to the power supply.
The PE100A starts automatically.
Connect PE100A to Internet
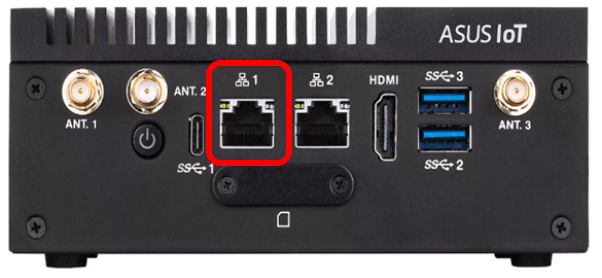
- Connect LAN port 1 to the Internet with Ethernet Cable.

- When a few minutes have passed after turning on the PE100A power supply, connect your PC or smart device to the PE100A via Wireless LAN.
There are two connection methods.
a) Connect by reading the QR code with a camera or other device.
b) Connect by entering the SSID and Password directly to a PC or smart device.
When the connection is complete, the "Cloud Configuration" screen opens automatically.
Select the Cloud Configuration
Check and record the Serial # (a).
It is required for the later step.Select the mode of usage from (b).
"DHCP" is selected by default.
If you select "Static IP", input the Static IP, Gateway address, and Netmask for this product.Tap (d) to start a test connection.
It may take several minutes.The result of the test connection will appear.
|
|
|
When "DHCP" is selected |
When "Static IP" is selected |
(c) [CANCEL] button
If you select this button, the changed settings will be cleared.

